>
It ain’t gene splicing. It’s Foundation Single Crochet (Fsc) splicing, and it’s a handy way to create more fabric at the fronts of a garment while keeping the right-hand and left-hand fronts looking exactly the same. I’ve been fielding a few questions from crocheters concerning this technique and fervently pray that the following exercise will help clear up some of your issues.
Many garment designs fit better if the front neck is lower than the back neck. There are other ways of creating this front neck drop, but I really believe the method offered here gives the most balanced result. Many of my garment designs are crocheted seamlessly from the top down beginning with a back neck foundation. From the foundation, the yoke grows as it goes, with increases in stitch pattern that create raglan-type shoulder shaping. Once you get to the level where you want the front neck to lie, it is necessary to add pattern repeats at each front neck edge. My method requires you to finish off a row, then start the next row with new yarn, beginning the new row with a short foundation, splicing into the working row on the yoke, then ending the row with a short foundation. I call these bits of foundation “front neck extensions”. I could have called them “pangalacticgargleblasters”, but that word already has a totally different usage and although the term is highly descriptive, it is not descriptive enough of the crochet technique. So “front neck extensions” it is.
Here’s an example. Those who know me will be totally astounded that I swatched something. Those who know me too well will know why I did it. This is the cardigan design Cinnabar, from the book Everyday Crochet. You are seeing the Yoke for size 40 through Round 3.
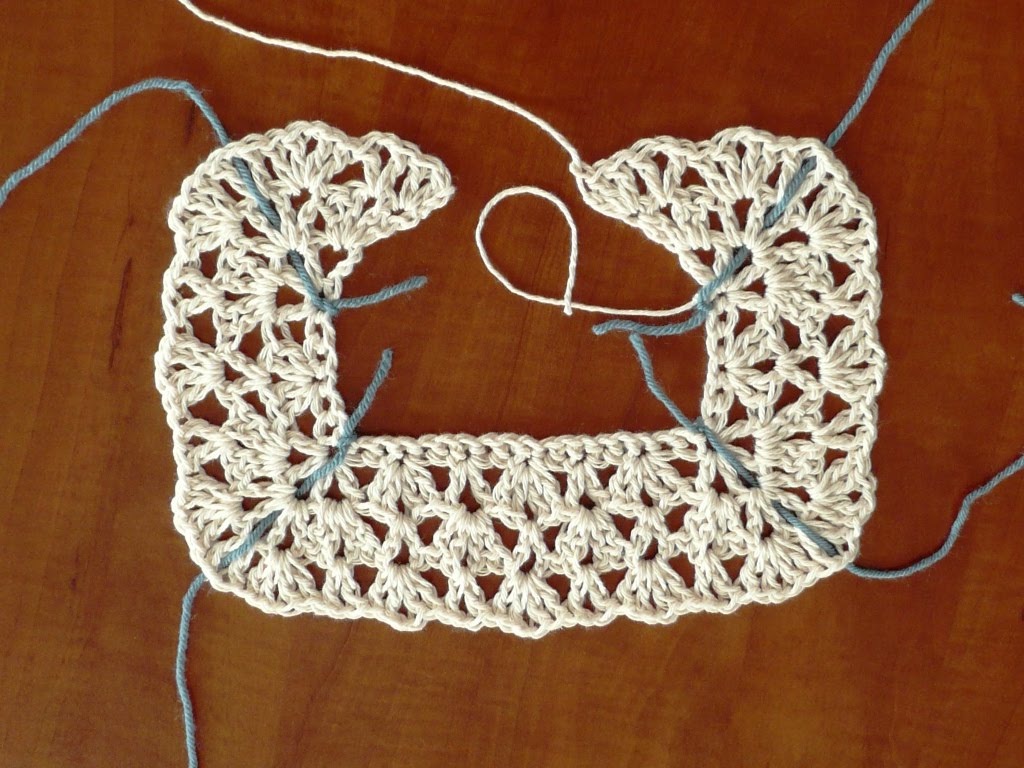
The blue things are wrapped yarn markers, anchored into the back neck foundation, flipped back and forth across the rows as you work them, marking the four increase points or “corners” of the yoke. At this point you fasten off. End the yarn. Take out your scissors and cut that sucker loose.
With new yarn, make the Fsc required, then return to the piece, go along and work across the row as if nothing happened. When you get to the other end, use your Fsc skills to add another little length of foundation.
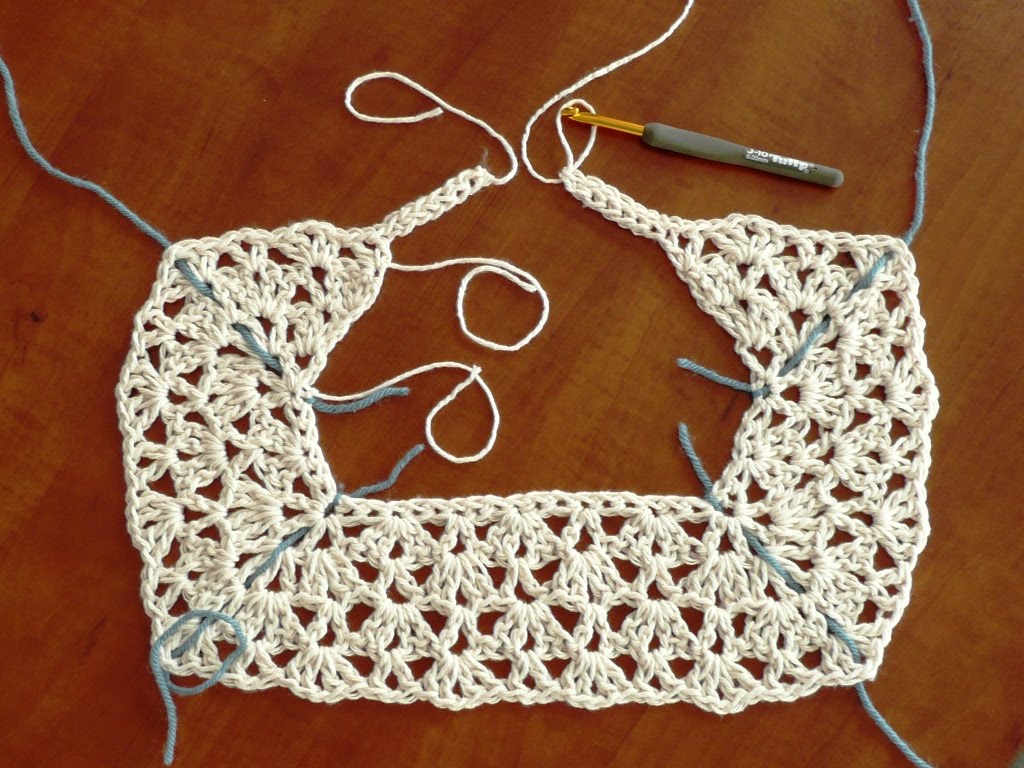
In the following row (not shown, because I do have a life), you will fill in the front neck foundations with some stitch pattern, in this case V’s and Shells. You now have the start of a round-neck cardigan yoke that is lower in the front neck, with right-hand and left-hand edges that can meet at the center front. It all looks wonky right now, but trust me. Once you finish that neck edge with some stitches or trim it will be beautifully and symmetrically rounded.

>Awesome – makes sense to me!And I love that you referenced Hitchhikers. Just proves that you are one seriously hoopy frood!
>Doris… you rock! Your post made me laugh out loud.
>I would love to be able to explain things about my crochet to other people like you 🙂
>Awesome! That's so helpful. Thank you!
>....................................................................................................
>Awesome post Doris! I've learned everything I know about top down from you,your diagrams and your colorful vocabulary! Thanks!
>such a great help…as they say, one picture is worth a thousand words, especially to visual learners like me….And a big thank you to all those doris masters who help the newbies.
>Coming late to the party, but this is really helpful! One question though… does making front neck extensions feel like being hit in the face with a slice of lemon wrapped around a large gold brick?
>Twice. 🙂
>jp成人,熊貓貼圖,成人圖片,成人文章,正妹,成人小說,杜蕾斯成人,ut 聊天室,熊貓貼圖區,交友聊天找e爵,ol制服美女影片,777成人區,bt成人,女同志聊天室,貼圖片區,一葉情貼圖片區,6k聊天室,69成人,成人貼圖站,色情影片,聊天室ut,免費成人影片,成人漫畫,0204貼圖區,小高聊天室,歐美免費影片,情色視訊聊天室,4u成人,pc交友,尋夢園聊天聯盟,玩美女人影音秀,666成人,免費視訊,聊天,情色論壇,視訊,成人文學,成人電影,漫畫貼圖,情色自拍,
>Hello!I am contacting you from Planet Blanket, my brand new crochet project in the Uk. I am appealing for submissions of granny squares from all over the world, 5 round squares or 10 round squares.The website is:http://planetblanket.wordpress.comIt has all the information on there.I am contacting you personally as I am a fan of your work. If you or anyone you know wishes to help with this project it would be amazing! I hope you can help.Best WishesJenn